Becoming a home barista: how to learn to make espresso at home
You have a machine. You have beans. Every morning you pull a shot. Whether it’s good is a bit of a gamble.
That’s the reality for most home baristas. Not because they’re doing it wrong — but because nobody has explained what a system is. Most instructions are about what to buy. This article is about what to do.
Becoming a home barista isn’t a matter of better equipment. It’s a matter of understanding which variables determine your shot — and getting them under control one by one.
First this: your setup is probably already good enough
Almost every guide on becoming a home barista starts with a shopping list. New grinder, better tamper, naked portafilter, puck screen.
Not here.
If you have a portafilter espresso machine, a grinder with adjustable grind size and a scale — you have everything you need to learn. What you’re missing isn’t a machine. What you’re missing is a method.
The barista in a good café doesn’t necessarily have better equipment than you. They have better habits.
The three variables that really matter
Espresso has many variables. Water temperature, pressure, distribution, tamping, bean humidity. But for a home barista there are three that determine every shot: grind size, dose and flow time.
Grind size This is the most impactful variable — and also the first one you adjust when something is off. Ground too coarse means water runs through too fast. The espresso is watery and sour. Too fine means water struggles to get through. The shot turns bitter and takes too long.
Baristas also call adjusting the grind ‘dialing in’ — finding the setting where all the variables come together. It’s a process, not a one-time action.
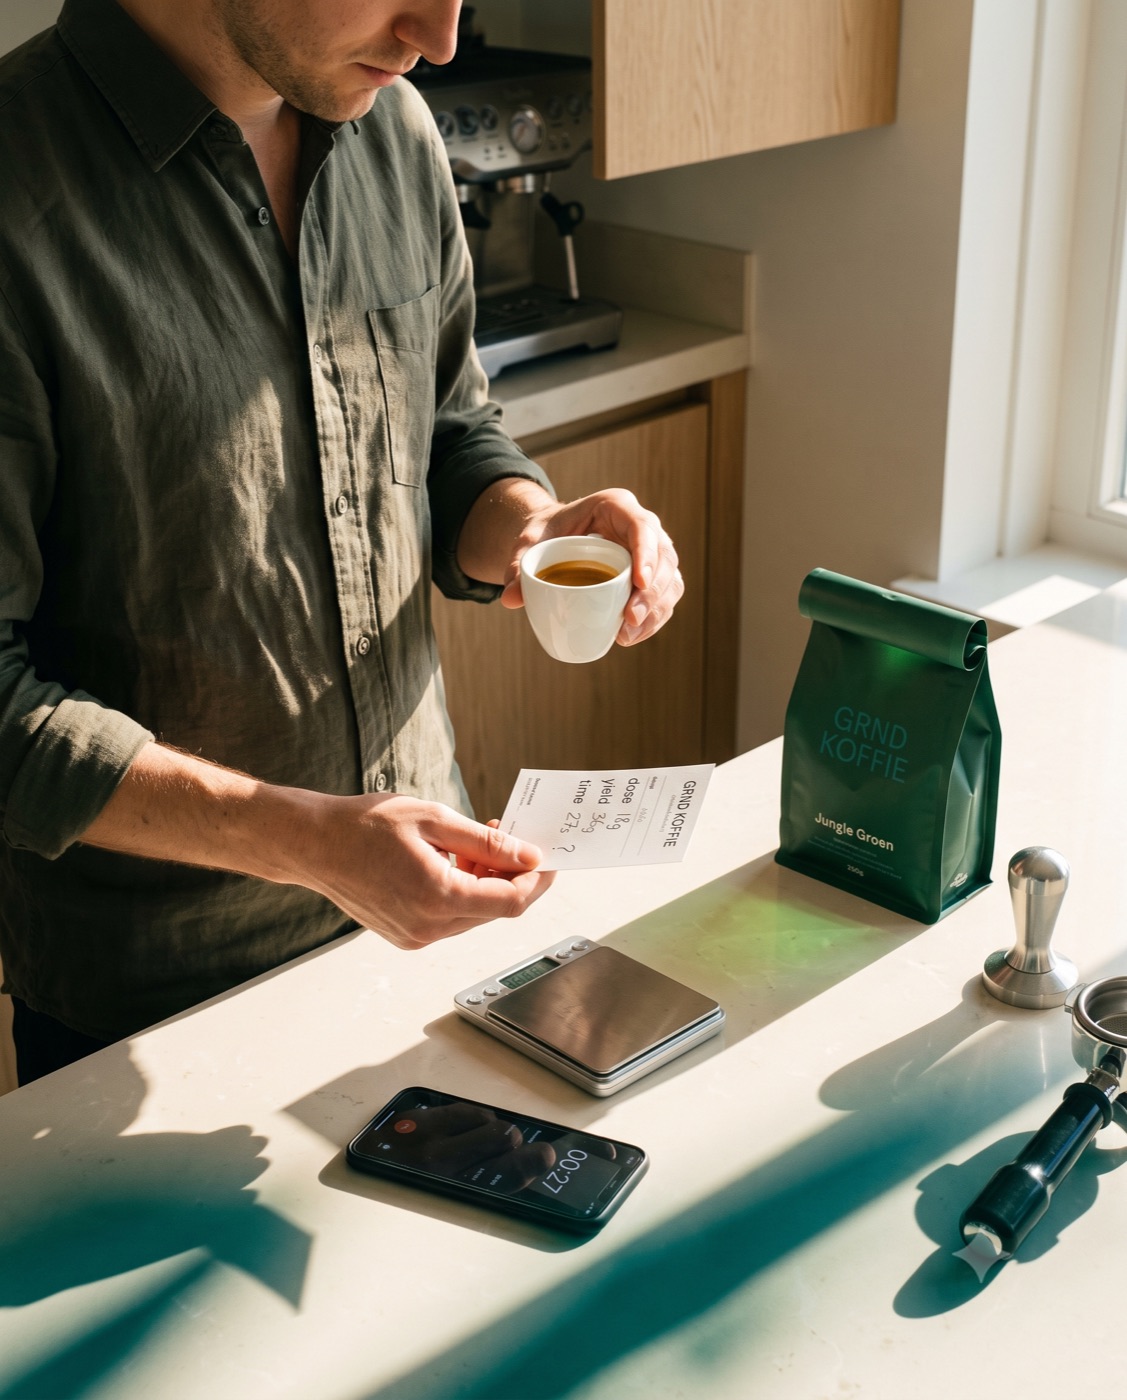
Dose How much ground coffee goes into your portafilter? Eighteen grams is a common starting point for a double shot. But “about 18 grams” isn’t the same as 18 grams. Always weigh it — with the same scale, at the same point in the workflow. Estimating produces inconsistency you can’t explain.
Flow time How long does it take for your shot to finish? The guideline is 25–30 seconds for a yield of 36 grams. But this is the result, not the cause. You adjust the grind to influence this number. Flow time is a diagnostic tool, not a goal in itself.
These three variables work together. Adjust one and the others shift with it. The golden rule: always change only one variable at a time. Otherwise you don’t know what made the difference.
What a good espresso session looks like
Consistency comes from repetition. Not inspiring, but true.
Step 1 — Warm up At least 15 minutes before you pull a shot. A cold group head pulls heat out of your shot and gives a different result than a warmed-up machine. Flush the portafilter before you start.
Step 2 — Weigh your dose Eighteen grams, the same scale, every time. This is the only way to know that dose isn’t a variable in your evaluation.
Step 3 — Grind fresh Ground coffee loses in minutes what beans lose in weeks. Always grind right before brewing — not five minutes earlier, not the night before.
Step 4 — Distribute and tamp evenly No crooked coffee bed. Use a distributor or your finger to level the grounds before you tamp. Tamp firmly and straight — not harder than necessary, but consistent.
Step 5 — Pull the shot and measure Start the scale when you turn on the pump. Stop when you reach the target yield — 36 grams as a standard, but this depends on your recipe. Note: grams in, grams out, seconds.
Step 6 — Taste. Then evaluate. Not the other way around. Tasting before you think gives you unbiased information. Then: was it sour? Too fast? Bitter? Grind coarser or finer?
After two weeks these six steps are automatic. Then you start tasting what variables do — and that’s the moment becoming a home barista really begins.
What to expect in the first four weeks
Week one and two: most shots aren’t what you wanted. That’s normal — and it happens to everyone. Three shots are tuition. Five too. You’re getting to know your machine and your beans, and that takes time.
Week three: you start recognizing what a good shot smells like before you taste. You already know from the flow time whether it’s likely good.
Week four: your first reference point is set. You know which grind and dose work for this specific bag of beans — and you know how to adjust it when something changes.
That’s what becoming a home barista means in practice. Not perfection in week one. But a system that gets you further in week four than in week one. And further in month three than in month one.
Your beans are a variable too
This is the point most guides skip.
Your shot changes when you open a new bag — even if your grind is on the same setting. New beans, new roast date, different position on the freshness curve.
Fresh beans (day 5–21 after roasting) contain more CO2. Water struggles more to get through. They sometimes call for a coarser grind than beans from week five, which have degassed further and let through faster.
A new bag is a new starting point. Always.
Practically: with a new bag, pull two or three test shots before you lock in your recipe. Watch the flow time. Adjust the grind if the shot runs too fast or too slow. Note what works.
More on how freshness affects your shot — and what the freshness curve exactly is — is in the article How old can your coffee beans be?
Milk foam — if you want a cappuccino
Briefly, because it’s a separate skill — and not the first one you should learn.
Steaming is about temperature and texture. Fill the jug about one third with cold milk. Set the steam wand just at the surface, left or right of centre so the milk swirls well. Add air until the jug feels as warm as your hand, around 35°C. Then push the wand slightly deeper and just roll the milk until 55°C, where milk is at its sweetest and ready to drink. Want hotter coffee? Roll a few seconds longer. Above 73°C the milk turns thin and flat.
The first ten attempts probably aren’t what you wanted. Professionals know that too. Milk foam is technical — and the only thing that helps is repetition.
Start with the espresso itself under control. Then milk foam.
Frequently Asked Questions
What’s the minimum I need to make espresso at home?
A portafilter espresso machine, a grinder with adjustable grind size and a kitchen scale. Without a scale you have no control over dose and yield — and then every result is chance.
How long does it take before I can make good espresso at home?
Three to four weeks for a consistent result, if you practice every day and note what you do. The machine teaches you nothing. Your routine teaches you everything.
Why does my espresso change with a new bag of beans?
Every bag has a different roast date. Freshness determines the CO2 content of the bean, and with it how fast water runs through. New bag, new starting point — always pull two or three test shots before you lock in your recipe.
How do I know if my espresso is good?
Flow time: 25–30 seconds for a 36-gram yield at an 18-gram dose. Flavor: not watery-sour (too coarse or too fast) and not bitter (too fine or too long). A good shot is balanced — sweet, full, without sharp edges.
What mistake do most beginners make?
Adjusting more than one variable at a time. If you change grind and dose and flow time in one session, afterward you won’t know what made the difference. Always adjust one variable, then taste, then evaluate.
Do I need to upgrade my grinder to make good espresso at home?
Not necessarily as a first step. A mid-range grinder with a consistent grind is enough to learn the system. Only upgrade once you know what you’re missing — not as a first investment.
How do I make milk foam at home?
Fill the jug one third with cold milk. Add air with the wand just at the surface until the jug is hand-warm, around 35°C. Then push the wand deeper and roll the milk to 55°C, the sweet drinking temperature. Don’t expect the first ten attempts to be perfect. That’s normal.
In closing
Becoming a home barista is a matter of developing and repeating a system for yourself, not buying one. Your shots don’t improve because of a new machine — they improve because you know what each variable does and why.
That starts with a starting point that’s right. The recipe that comes with your EasyBeans beans gives you exactly that: a dose that works, a recommended extraction time, and a starting point for your grind. No rabbit hole. Just a good first shot you can build on.
Find the starting-point recipe for your setup here →
See also: Dialing in espresso: why your good shot disappears and how to get it back · Which coffee beans do you choose as a beginner?